Audience
OPC server access requires that you:
- Know how to insert an ActiveX plugin into Scorpion
- Knowledge about OPC concept and features
- Are familiar with Python scripting
More on Installation - Setup -
Documentation and Examples
Accessing OPC Servers from Scorpion
An
OPC server is capable of maintaining process variables based on data types as
defined in COM/OLE.
An OPC server is identified using a servername and an accesspoint.
The OPC server exposes a set of process variables as ASCII names.
OPC is a standard and many companies in the automation business implement
an OPC server for accessing their equipment.
In order to find the right OPC server variable names you must consult the
OPC server’s documentation or try to browse the server with a
client capable
of browsing such as the SIEMENS OPC Scout.
You
can add OPC server support to your Scorpion project by installing
AnOpcClientX.ocx - an ActiveX with a companion Python module anopcclientx.py.
In order
to use AnOpcClientX for OPC server access you must complete the to do list
below:
-
It is recommended to have a OPC Client
Software installed
- Register
AnOpcClientX.ocx using the setup program or use regsvr32
- Identify
the servername of the OPC server
- Identify
the accesspoint of the OPC server
- Identify
the variable names you are going to access
- Insert
AnOpcClientX as a Scorpion plugin
- Copy
the anopcclientx.py file to your project's Python directory
- Write
code in Central.Start to setup the connection to the OPC server
-
Set the ServerName property
-
Set the AccessPoint property
-
Connect
-
Add OPC items
- Trap
the OnChangeDataStr handler
-
When a subscribed OPC item changes value or state a notification is posted
through this handler
- Add
code to read or write OPC Items
- Write
code in Central.Stop
Hint: In order to find the correct server name and tag
names an OPC Client software must be opened and used for browsing for the server
name and tag names of the installed server. Normally the OPC server software
packages used, have an OPC client software that can be used for this.
THE GUI
When you
add the AnOpcClientX component to your application you will see this:
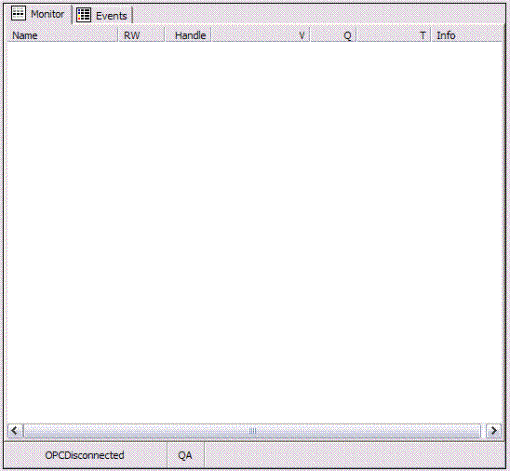
There
are 2 TABS. The Monitor TAB shows any active OPC variables.
The Events tab shows system events.
This is the place to look if erroneous operation is suspected.
In the lower part of
the control there is a status bar with 3 panels. The
leftmost panel gives you the state of the connection.
It will light up in green color if a successful connection is
established. The panel in the
middle with the text QA is RED if data with bad quality is received.
The rightmost panel contains the last error encountered and turns RED and
remains so until the user acknowledges the message by clicking on the panel.
ADDING
OPC SERVER ACCESS TO SCORPION
Scorpion
Vision Software is capable of using ActiveX
Controls – but with some limitations:
-
Support only the basic datatypes:
- The
method interface is string based.
-
You
have to format parameter lists as strings with item/value pairs.
- The
function/method returns are string based
-
again as item/value pairs.
Conclusion: ActiveX access requires
a
bit of programming.
To make
things easier a Python module anopcclientx.py is supplied.
This module contains a class AnOpcClientX which uses an
Xml gateway in
the AnOpcClientX ActiveX.
The
gateway is implemented as a method accepting an xml string as input, returning
an xml string as output.
The xml
gateway implements a “remote procedure call” mechanism in the ActiveX.
The
Python class exposes a minimum set of methods required for accessing AnOpcClientX.
AnOpcClientX has a
string based event interface as well – particularly well suited for Python
integration.
Add the AnOpcClientX
to a Scorpion Profile
-
Start Scorpion Vision Software.
-
Enter the service mode and select the Advanced TAB.
-
Select the Central TAB and the Plugins sub TAB.
-
Press the New Page TAB and give it the name OPC.
-
Then insert a new control and select AnOpcClientX.
Scorpion
now imports all the methods and events exposed by the control.
The control is now appearing within the plugin panel you selected.
The next
thing to do is to make sure that anopcclientx.py is available to Scorpion.
-
Add it to the
Python
subdirectory of your profile
Note: It can also be available in the Scorpion Vision Distribution - Python
directory
Importing
anopcclientx
In
Scorpion the Central.Start script is executed every time Scorpion starts.
The Central.Stop script is executed just
before scorpion
terminates. This means the
Central.Start is the right place to import the anopcclientx.py module and
to
initialize OPC server access. Central.Stop
is the right place to disconnect from the OPC server.
|
import anopcclientx
opc=anopcclientx.AnOpcClientX(OPC)
ServerName='TordivelAS.AnOpcServerX'
AccessPoint=''
opc.SetAccessPoint(AccessPoint)
opc.SetServerName(ServerName)
print opc.Connect()
|
The code above imports the
anopcclientx module and creates an instance of the AnOpcClientX class.
Note that the parameter to the constructor is OPC – the name of the
plugin where we inserted the AnOpcClientX ActiveX.
From this point on we can access the various available methods of the Python
interface class.
In the example we
-
Define
the ServerName and the
AccessPoint as required
-
Perform a connect
to the given defined opc server
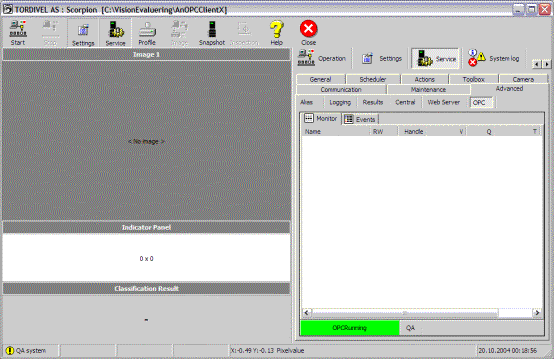
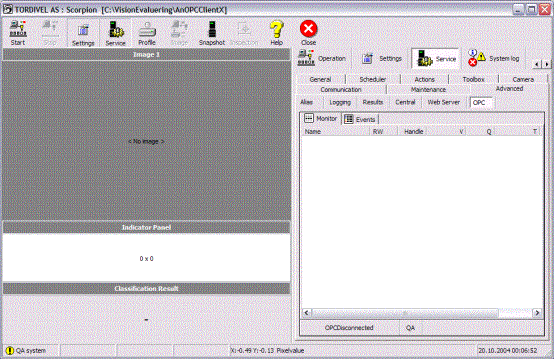
The screenshot shows
that we have successfully connected to the OPC server. The remaining tasks
are now:
- Trapping
the OnChangeDataStr
event handler
- Adding
the items we want to access.
- Disconnecting
from the OPC server in Central.Stop
Modified
Central.Start
|
import anopcclientx
opc=anopcclientx.AnOpcClientX(OPC)
ServerName='TordivelAS.AnOpcServerX'
AccessPoint=''
opc.SetAccessPoint(AccessPoint)
opc.SetServerName(ServerName)
print opc.Connect()
opc.AddItem('B00','B[00]')
opc.AddItem('S00','S[00]')
opc.AddItem('D00','D[00]')
opc.AddItem('L00','L[00]')
opc.AddItem('T00','T[00]')
|
Note:
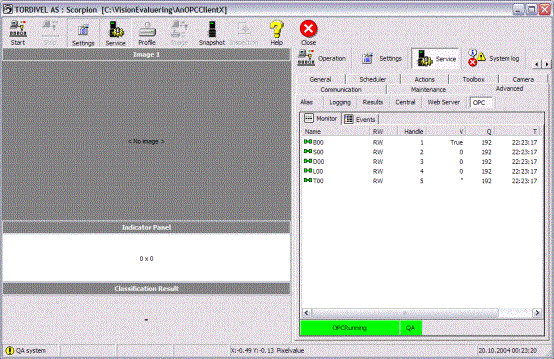
The
screenshot shows that the items have been added successfully.
In Central.Stop:
In
order to trap the OPC.OnChangeDataStr event handler we will check the event in
the Central TAB:
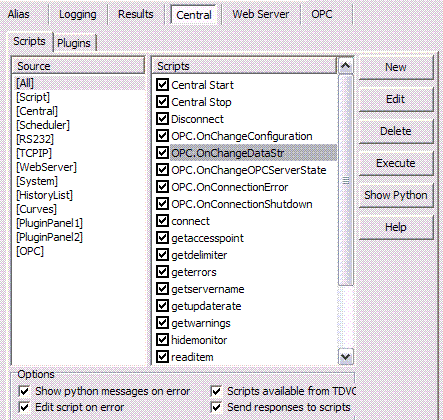
OPC.OnChangeDataStr
|
def
Handle_OPC_OnChangeDataStr(Count,N,H,V,Q,T):
#
# Count = VT_I4
# N = VT_BSTR
# H = VT_BSTR
# V = VT_BSTR
# Q = VT_BSTR
# T = VT_BSTR
#
print
'OnChangeDataStr',Count,N,H,V,Q,T
print eval(N)
print eval(H)
print eval(V)
print
eval(Q)
t=eval(T)
print
t
for
it in t:
print opc.t2d(it)
|
Comments:
- Count
- the number of items the OPC server reports as changed.
- N
is a list of strings
- that contains
name of the items the OPC server reports
changed
- H
is a list of
corresponding
handles
- V
is a list of corresponding
values
- Q
is a list of the corresponding
qualities
- T
is a list of the corresponding
timestamps
The Count the define the length of the lists
If
a quality is equal to 192 the data is reliable.
The timestamp may be decoded into a dictionary of integer items using the
opc.t2d() method.
The
output of the OPC.OnChangeDataStr event handler is as listed:
|
OnChangeDataStr 2 ['B00','S00'] [1,2] [-1,0]
[192,192] ['22:23:17:585 19.10.2004','22:23:17:615 19.10.2004']
['B00', 'S00']
[1, 2]
[-1, 0]
[192, 192]
['22:23:17:585 19.10.2004', '22:23:17:615 19.10.2004']
{'min': 23, 'hr': 22, 'mth': 10, 'sec': 17, 'ms': 585, 'yr': 2004, 'day':
19}
{'min': 23, 'hr': 22, 'mth': 10, 'sec': 17, 'ms': 615, 'yr': 2004, 'day':
19}
OnChangeConfiguration 2 ccrAddItem
OnChangeDataStr 3 ['D00','L00','T00'] [3,4,5] [0,0,''] [192,192,192]
['22:23:17:645 19.10.2004','22:23:17:665 19.10.2004','22:23:17:685
19.10.2004']
['D00', 'L00', 'T00']
[3, 4, 5]
[0, 0, '']
[192, 192, 192]
['22:23:17:645 19.10.2004', '22:23:17:665 19.10.2004', '22:23:17:685
19.10.2004']
{'min': 23, 'hr': 22, 'mth': 10, 'sec': 17, 'ms': 645, 'yr': 2004, 'day':
19}
{'min': 23, 'hr': 22, 'mth': 10, 'sec': 17, 'ms': 665, 'yr': 2004, 'day':
19}
{'min': 23, 'hr': 22, 'mth': 10, 'sec': 17, 'ms': 685, 'yr': 2004, 'day':
19}
|
Comments:
- The
OPC server posts the changes in this case as two separate events.
- The first event contains only the “B00” item.
- The second event contains the remaining items “L00”, “D00”,
“T00”.
- By
using the eval() function we can decode the strings directly into Python
lists.
- The
timestamp may be further decoded into a dictionary where we can access the
various timestamp fields as [‘min’], [‘hr’] etc.
Reading
and Writing
Reading
may be performed using the opc.ReadItem() method.
Writing may be performed using the opc.WriteItem() method.
Python does not support parameter returns by address.
Instead tuples are returned.
The ReadItem method returns a tuple containing two sub-tuples.
R=opc.ReadItem(somename)
T1=R[0]
T2=R[1]
T1[0] is the result. 1 means
successful operation.
T1[1] is the value.
T1[2] is the quality
T1[3] is the timestamp
T2[0] is exception information.
T2[1] is error information.
T2[2] is warning information.
If T1[0]<>1 you will check T2 for additional information.
The WriteItem
method returns a tuple containing two sub-tuples.
R=opc.WriteItem(somename,somevalue)
T1=R[0]
T2=R[1]
T1[0] is the result. 1 means
successful operation.
T1[1] is a string – normally blank.
T2[0] is exception information.
T2[1] is error information.
T2[2] is
warning information.
If T1[0]<>1 you
must check T2 for additional information.
READING
OPC TAGS
|
def readitem():
r= opc.ReadItem('B00')
print 'B00',r
r= opc.ReadItem('T00')
print 'T00',r
r= opc.ReadItem('L00')
print 'L00',r
r= opc.ReadItem('D00')
print 'D00',r
r= opc.ReadItem('S00')
print 'S00',r
|
Create a script in
Central and give it the name readitem.
The code above does that and also reads the contents of our
variables.
Note: The scorpionTagName in AddItem defines the alias of
the opc item.
The
output is:
|
B00 ((1L,
'-1', '192', '22:48:00:657 19.10.2004'), ('', 'None', 'None'))
T00 ((1L, '', '192', '22:48:00:787 19.10.2004'), ('', 'None', 'None'))
L00 ((1L, '0', '192', '22:48:00:757 19.10.2004'), ('', 'None', 'None'))
D00 ((1L, '0', '192', '22:48:00:717 19.10.2004'), ('', 'None', 'None'))
S00 ((1L, '0', '192', '22:48:00:687 19.10.2004'), ('', 'None', 'None'))
|
|
def writeitem():
print '-'*10
print
opc.WriteItem('B00',1)
print opc.WriteItem('T00','hello')
print opc.WriteItem('L00',-99)
print opc.WriteItem('S00',0.001)
print opc.WriteItem('D00',0.002)
print '-'*10
|
There is one more event you should
respond to in a production system.
The
OnConnectionShutdown event is fired if the OPC server closes operation.
The recommended action is to close the connection to the OPC server immediately.
|
def
Handle_OPC_OnConnectionShutdown(Reason):
print
'OnConnectionShutdown:',Reason
opc.Disconnect()
|
In
our demo we close the OPC server TordivelAS.AnOpcServerX and observe the output:
|
OnConnectionShutdown:
Window Closed while running in desktop mode.
|
Because
we disconnected immediately when the event handler was called we have completed
the contract.
OTHER
CONSIDERATIONS
Because
you will get an event every time the OPC variables (items) you have subscribed
to changes. This includes
the first time you add the variable with AddItem.
Hint: You can
have to use a shadow
register to keep a copy of the previous value. This
can especially useful when you want to take action as response to triggers. By keeping a copy
of the last value you can for
example easily implement edge triggers.
Use
Python dictionaries for this task. Initialize the dictionary with values
of the correct type using the exact name of the alias you set up for
the variable.
opc_var={}
opc_var['B00']=0
opc_var['L00']=0
opc_var['D00']=0.0
Then use the name of the
variable passed to you in the OnChangeDataStr event handler
|
def
Handle_OPC_OnChangeDataStr(Count,N,H,V,Q,T):
Names=eval(N)
Values=eval(V)
for i in range(len(Names)):
if Names[i]=='B00':
# do the action
opc_var[Names[i]]=Values[i]
|
WHERE DO I PUT THE SCRIPTS ?
A structured way of setting up IO scripting is:
| Central.Start |
Connect to the OPC server
Add OPC Items |
| Central.Stop |
| Disconnect from the OPC server |
| Central.Scripts |
| In central you can define a number of useful
scripts. You can simplify syntax by defining your own access
functions. |
| Handlers |
| Trap the OnChangeDataStr handler |
All the modules are located on the Scorpion CD.
|
