| Images in Scorpion are supported by many commands
activated by right-clicking the image. Below the image menu is shown:
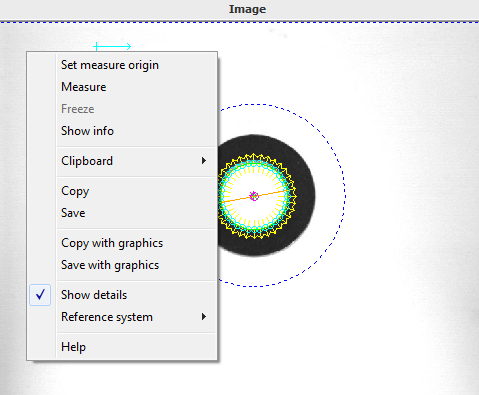
Main image operations groups:
- Clipboard commands - draw and edit polygons and ROIs in the image
- Exporting images
- an image can be saved to file or copied to the clipboard
with or without overlay graphics
- when working without graphics the raw image is transferred -
with graphics a copy of the screen is transferred
 Image
operations Image
operations
- Set measure origin - activates image measurements
- Measure - de/activates image measurements
- Freeze - freeze the image
- Show info - when selected a text line with point information
will follow the cursor
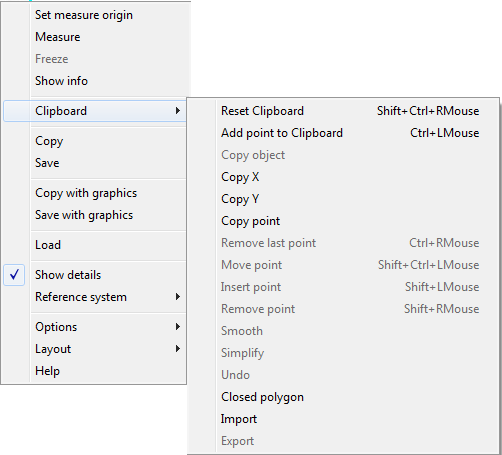
- Clipboard - see screenshot to the right
- Reset Clipboard - Ctrl+Shift+RMouse - clears polygon on clipboard
- Add point to clipboard - Ctrl+LMouse - adds point to clipboard
- Copy object - copies any overlay object into
clipboard
- Copy X - copies the x- cursor position to the clipboard
- Copy Y - copies the y-cursor position to the clipboard
- Copy point - copies x and y cursor position to the clipboard
- can be used to paste the position into a tool
- Remove last point - Ctrl-RMouse
- Move point - Shift+Ctrl+RMouse - move selected point
- it can be easier to remove and insert a new point than
moving
- Insert point - Shift+LMouse
- Remove point - Shift+RMouse
- Smooth - smoothes the clipboard polygon
- Simplify - removes points on a straight line
- Undo - will undo last operation
- Closed polygon - will open or close polygon
- Export - exports the polygon
- Copy
- Save
- Copy with graphics
- Save with graphics
- Load - opens a filebrowser where you can select a
stored image
- Show details - unselect and the image graphics are removed from
the image
- Reference system - select the working reference system.
Scorpion can e.g. be set to work in robot coordinates.
- Options - This is only available in service mode.
- Zoom/pan siblings... - Opens dialog for image sibling configuration
- Operator menu
- Show Histogram
- Show Pan View - when selected and you zoom in, a pan window is
shown at the upper left corner of the image.
- Auto Panning - useful when working with polygons and have zoomed
into he image. If you place a point outside the image border, the
image view will automatically change to show the area where you
pointed.
- Background
- Pointing precision - a number of pixels between 3 and 10
- Layout - configures the image layout on screen. This is only available in service mode.
See more details in Layout Setup below.
- New - creates a new overview
- Setup - configures an image or an overview
- Arrange - configures the order of the images in an overview
- Delete - deletes an overview
- Single images - here you can choose which of the images to
be shown in separate panes: All, None or you can select each of
them by name.
- Help - activates this page
Image Zoom
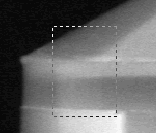
- Zoom in - click left mouse button and drag the cursor
- Pan the zoomed rectangle - while zooming in, press the Alt button
- Zoom out - right click the mouse in the image
Note: Multiple zoom operations will create a stack of zoom levels -
to completely un-zoom the image right click the mouse button repeatedly.
Layout Setup
There are two types of Image panes:
- Image - displays one image
- Overview - displays a user defined set of images
The picture shows the Overview configuration dialog.
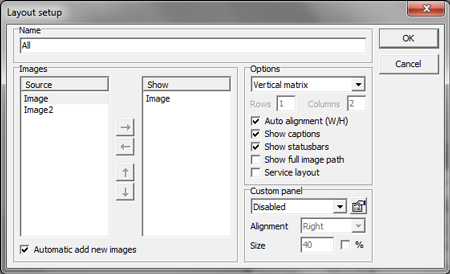
Name - the name of the overview
Images - defines the images shown in an overview pane
- Source - displays available images
- Show - sequence of selected images
- <- - removes selected image from the overview
- -> - adds selected image to the overview
The picture below defines the configuration dialog for one image. The
rest of this description is valid both for an image and overview setup.
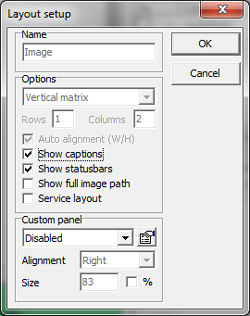
Options
- Image presentation
- Horizontal sequence - displays all images in one row
- Vertical sequence- display all images in one column
- Horizontal matrix - displays the images in a matrix, more columns than rows
- Vertical matrix - displays the images in a matrix, more rows than columns
- Auto alignment - select the best fit image view when changing
the image mode
- Show captions - display image captions
- Show statusbar - show a statusbar with image name and
size below each image
- Show full image path - display full image name path in
the statusbar
Custom panel - here you can decide the layout of an additional
custom panel.
- Disabled | Only in image mode | Only in normal mode | Always
- Alignment - Left | Top | Right | Bottom - alignment
relative to the image
- Size - given in pixels
Zoom/pan siblings
Sometimes it is required to have a zoom/pan working on several images at once (example: original image + filtered image).
Zoom/pan siblings functionality allows user to "lock" several images to zoom and pan together.
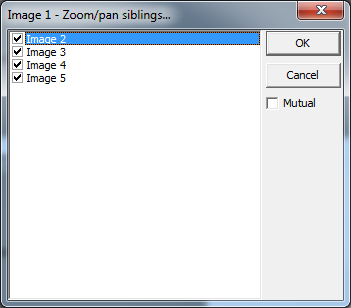
To setup "locked" zooming/panning select Zoom/pan siblings... command. Selected command opens a dialog shown below.
Select images you want to "lock" together and click Ok. If you want to remove "lock" deselect images and click Ok.
Initially a "lock" works both ways (zooming/panning image 1 zooms/pans locked image and vice versa). If you need one way "locking"
(image 1 zooms/pans locked image but locked image does not zoom/pan image 1) then select Zoom/pan siblings... on locked image
and remove image 1 from its list.
If Mutual checkbox is selected then it means that the zoom/pan siblings functionality will be aplied globaly. Example if you select
Image 2 and Image 3 then all the previous settings will be cleared and current image, Image 2 and Image 3 will be coupled together with each other.
Measure intensity values
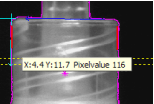
Click the right mouse button in the camera image. Select Show info, and a text line with
point information will follow the cursor.
Measure
You can measure distances and angles directly in the image by using
the Set measure origin, Measure and Freeze commands. Click the right mouse
button when starting (Set measure origin) and ending (Freeze). The measuring
result is shown on the cursor text line. This value relates to the
reference system chosen for the image. You can make new reference
systems within the Scorpion toolbox. The default reference system is
set using Reference system in the menu below. By default pixels are
used to give the results. When a tool in the toolbox is active the
reference system is set by the tool.
Define polygons
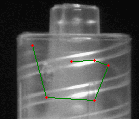
You can draw and edit polygons on an image with the Clipboard
operations. The purpose is to define lines and ROIs for image tools like PolyLineGapFinder and Blob2. Open the
pop-up menu on the right mouse button over the wanted point and select
Add point to Clipboard. You will see the point marked in the image.
Continue adding points and Scorpion will automatically draw lines
between them. If you choose the Closed polygon option, a line will
also automatically connect the first and last points. A shortcut to
add point is pressing Ctrl and the right mouse button. Points are
removed by pressing Ctrl and the left mouse button. To the right a
polygon line is shown.
- Ctrl - RMouse - add point to clipboard
Ctrl-Z will copy the clipboard content to the the tool selected in the toolbox.
Depending on the tool the intepretation differs. More information about
interpretation is given in the toolbox
section. |